
The Best Fluffy Pancakes recipe you will fall in love with. Full of tips and tricks to help you make the best pancakes.

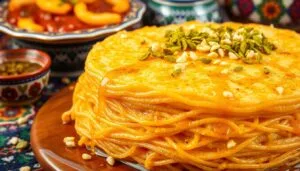
Imagine the smell of freshly baked pastry and the crunch of shredded phyllo. Then, there’s the gooey, creamy cheese filling. This is kunafa, a dessert loved for centuries in the Middle East. It’s a treat that brings joy to special occasions and family gatherings.
The rich, buttery flavors and the mix of textures in each bite are amazing. They remind me of the vibrant markets of the Levant. There, the scent of kunafa fills the air, making everyone’s mouth water.
Table of Contents
Understanding Kunafa: A Middle Eastern Delicacy
Kunafa is a beloved Middle Eastern dessert with a rich history. It is believed to have originated in the Palestinian city of Nablus. The famous Knafeh Nabulsieh has become a culinary icon there.
Kunafa is more than a dessert. It’s a symbol of Middle Eastern culture and tradition. It’s often served during the holy month of Ramadan as a special treat.
Origins and Cultural Significance
The origins of kunafa are traced to the 10th century in Damascus or the 15th century in Egypt. Over the centuries, it has become a key part of Middle Eastern cuisine. Each region and country has put its own unique spin on the recipe.
Today, kunafa is enjoyed by millions worldwide. Modern interpretations, such as knafeh bars, are becoming increasingly popular.
Types of Kunafa: Na’ameh vs. Khishneh
There are two main types of kunafa: Na’ameh and Khishneh. Na’ameh is made with semolina flour, while Khishneh is made with shredded phyllo dough. The famous Knafeh Nabulsieh from Nablus is an example of the na’ameh type.
It has a delicate texture and sweet cheese filling.
Regional Variations Across the Middle East
Kunafa has evolved across the Middle East. Different countries and regions have developed their own unique preparations and ingredients. For instance, Turkey’s Hatay province is known for its künefe.
It’s made with a regional cheese and semolina dough, adding a distinct flavor. The Palestinian city of Nablus set the world record for the largest knafeh ever recorded. This shows the strong connection the region has with this beloved dessert.
“Kunafa is not just a dessert – it’s a symbol of Middle Eastern culture and tradition, often served during the holy month of Ramadan as a special treat.”
Essential Ingredients for Perfect Kunafa
Making a delicious kunafa, a favorite Middle Eastern dessert, needs the right ingredients. At its core is the kataifi, a shredded phyllo dough that gives it a special texture. The filling is creamy, with cheeses like Akkawi and fresh mozzarella.
Unsalted butter is key for the golden-brown color and shine. The sweetness comes from rose water syrup, with its rose essence. Or, you can use orange blossom water for a different flavor. A sprinkle of ground pistachios adds crunch and color.
Finding these ingredients can be fun, especially in Middle Eastern or Greek stores. With some prep and the right tools, you’ll make a dessert that feels like a trip to the Middle East.
“The secret to a truly memorable kunafa lies in the harmonious balance of its essential ingredients – the buttery kataifi, the rich cheese, and the fragrant syrup.”
Traditional Kunafa Recipe: Step-by-Step Guide
Making kunafa, a favorite Middle Eastern dessert, needs a mix of skills and ingredients. Let’s explore how to make this sweet treat step by step.
Preparing the Kataifi Dough
Start by shredding the kataifi dough into thin strands. Then, toss the strands with melted butter to coat them evenly.
Making the Cheese Filling
To make the cheese filling, mix soaked Akkawi cheese with fresh mozzarella. Whisk until it’s smooth and spreadable.
Assembling the Layers
Heat your oven to 350°F (177°C). Place half of the buttered kataifi dough in a baking dish. Add the cheese filling, then the rest of the kunafa dough. Press down gently to form layers.
Bake for 30-45 minutes until the top is golden and crispy. The cream cheese filling will melt, adding a nice contrast.
After baking, let the kunafa cool a bit. Then, drizzle with lemon-infused simple syrup. This adds a sweet touch and enhances the flavor.
Follow these steps to make traditional kunafa at home. Enjoy the taste of the Middle East in your kitchen.
Creating the Perfect Sugar Syrup
The sugar syrup is key to making traditional kunafa special. It adds sweetness and a floral touch, changing the dessert’s taste. This makes the whole experience better.
To make the syrup, mix 1 cup of sugar with 2 cups of water in a pan. Heat it until boiling, then lower the heat. Let it simmer for 5 to 7 minutes until the sugar dissolves.
After it thickens a bit, add a tablespoon of fresh lemon juice. Also, add a teaspoon each of rose water and orange blossom water. These ingredients give the kunafa a unique smell and taste.
You can adjust the rose water and orange blossom water to your liking. This way, you can make the syrup just right for you. Plus, you can make it ahead of time and keep it in the fridge for up to 4 weeks.
| Ingredient | Quantity |
|---|---|
| Granulated Sugar | 1 cup |
| Water | 2 cups |
| Lemon Juice | 1 tablespoon |
| Rose Water | 1 teaspoon |
| Orange Blossom Water | 1 teaspoon |
With the right sugar syrup, you’re ready to make delicious kunafa. It will take you on a taste journey to the Middle East.

Tips for Working with Kataifi Pastry
Working with kataifi pastry, a key part of kunafa, needs a gentle touch. It’s made from shredded kunafa dough. This ingredient is special and requires attention to get the right texture and taste in your kunafa.
Handling and Storage Methods
Thawing kataifi pastry right is important. Follow the package instructions to thaw it slowly. After thawing, handle the strands gently to avoid tangling. Make sure to coat all strands with unsalted butter for the best taste and texture.
Storing leftover kataifi pastry properly is key. You can freeze it for later use. This way, you’ll always have it ready for your kunafa recipes.
Proper Butter Application Techniques
Butter or unsalted butter application is crucial. Melted butter should cover all strands evenly. This makes the pastry crispy and golden, adding flavor to your kunafa.
“Kataifi pastry is the heart and soul of the perfect kunafa. Mastering the art of handling and preparing this delicate dough is the key to unlocking the true essence of this beloved Middle Eastern dessert.”
Cheese Selection and Preparation Guide
Making the perfect cream cheese filling is key to a traditional arabic dessert kunafa. You can use Akkawi or Nabulsi cheese, or try ricotta and mozzarella for a twist. This lets you create your own version of this Middle Eastern treat.
Soaking Akkawi cheese in water for a few hours is important. It removes excess salt. This makes the flavor balance out, matching the syrup’s sweetness and the pastry’s crunch.
- For a richer, creamier filling, blend Akkawi, ricotta, and mozzarella cheeses.
- The cheese mix should be spreadable but not too thin. It needs to hold the dessert’s shape while baking.
- Try different cheese ratios to find the flavor you like best.
| Cheese Type | Pros | Cons |
|---|---|---|
| Akkawi | Authentic flavor, firm texture | Requires soaking to remove excess salt |
| Ricotta | Creamy, smooth texture | Slightly milder flavor than traditional options |
| Mozzarella | Melts well, adds gooey texture | May need to be combined with other cheeses for optimal flavor |
The cheese filling is the heart of kunafa. So, take your time to experiment. Find the perfect mix that makes your homemade arabic dessert special.
Baking Techniques and Temperature Control
Preparing the perfect middle eastern cuisine starts with baking the sweet cheese pastry like kunafa. The right baking techniques and temperature control are key. They help achieve the ideal texture and doneness.
Signs of Perfect Doneness
To know if your kunafa is done, look for a few signs. The top should be golden-brown and crispy. The cheese inside should be melted and delicious.
Check the edges too. They should be deep, caramelized brown. This shows the dough is perfectly baked.
Troubleshooting Common Issues
- Underbaked centers: If the center is still doughy, try baking at a higher temperature or for longer. This ensures even cooking.
- Overly browned tops: If the top gets too dark, reduce the oven temperature or cover with foil. This prevents over-browning.
Finding the right balance is crucial. Adjust the oven temperature and baking time to get the perfect result.
Once baked, let the kunafa cool a bit before adding syrup. This keeps the pastry crisp as it absorbs the syrup.
“Achieving the perfect balance of crispy and gooey is the hallmark of a truly exceptional kunafa.”
Serving and Presentation Ideas
Serving kunafa dessert right is key. Serve it warm for the best taste and texture. Place the kunafa on a platter and drizzle with sugar syrup just before serving.
For a Middle Eastern touch, sprinkle ground pistachios on top. The green pistachios add color and crunch, enhancing both looks and taste.
Try serving kunafa in ramekins or small cups for a personal touch. It makes each bite perfect. Pair it with mint tea for a true Middle Eastern treat.
| Serving Size | Preparation Time | Baking Time | Total Time |
|---|---|---|---|
| 9 servings | 30 minutes | 20 minutes | 50 minutes |
Focus on how you serve and present your kunafa. It can make the dining experience even better. It’s a way to share the rich flavors of the Middle East with your guests.

“Kunafa is not just a dessert, it’s a cultural experience that brings people together.” – Samira Kazan, renowned Middle Eastern chef
Conclusion
Learning to make kunafa, a favorite Middle Eastern dessert, is a fun journey. You’ll need the right ingredients and a bit of patience. This way, you can enjoy the crispy pastry, gooey cheese, and sweet syrup at home.
There are many ways to make kunafa, from the classic to new flavors like chocolate or pistachio. This dessert is versatile, so everyone can find something they like. By learning about its origins and cultural importance, you can make each bite special.
Keep focusing on the details as you get better at making kunafa. Pay attention to the kataifi dough and the syrup’s sweetness. With time and effort, you’ll become a pro at making this delicious dessert. Then, you can share it with your loved ones.
FAQ
What is kunafa?
Kunafa is a Middle Eastern dessert. It’s made from shredded phyllo dough, sweetened cheese, and syrup. It comes from the Levant, like Palestine, Jordan, Lebanon, and Syria.
What is the history of kunafa?
Kunafa’s history goes back centuries. It’s believed to have started in Nablus, West Bank. There are two kinds: coarse and fine, made with different ingredients.
What are the key ingredients in kunafa?
Kunafa needs kataifi, cheese, butter, sugar syrup, and rose or orange blossom water. Pistachios are used for garnish.
How do you prepare kunafa?
Start by shredding kataifi and coating it with butter. Mix soaked Akkawi cheese with fresh mozzarella for the filling. Layer half the kataifi, add the cheese, and top with the rest.
What is the role of the sugar syrup in kunafa?
Sugar syrup is key in kunafa. Mix sugar, water, lemon juice, rose, and orange blossom water. You can make it ahead and store it in the fridge.
How do you work with kataifi pastry?
Kataifi needs careful handling. Thaw it first and shred it into pieces. Make sure to coat all strands with butter for the right texture.
What types of cheese are used in kunafa?
Traditional kunafa uses Akkawi or Nabulsi cheese. But you can also use ricotta or mozzarella. Soak Akkawi to remove salt. Mixing cheeses gives a better flavor.
How do you bake kunafa for the best results?
Bake at 350°F (175°C) for 40-45 minutes. It should be golden brown with a crispy top and melted cheese. Adjust as needed.
How do you serve kunafa?
Serve kunafa warm for the best taste. Invert it onto a platter and drizzle with syrup. Add ground pistachios for flavor and looks.


